Oracle 11gr2 ASM & Database Installation on RHEL 5.4
For Oracle11g Database
Document to know about Automatic Storage Management and Oracle11gR2 ASM database installation.
Introduction
ASM is a volume manager and a file system for Oracle database files that supports single-instance Oracle Database and Oracle Real Application Clusters (Oracle RAC) configurations. ASM is Oracle’s recommended storage management solution that provides an alternative to conventional volume managers, file systems, and raw devices. ASM uses disk groups to store data files; an ASM disk group is a collection of disks that ASM manages as a unit. Within a disk group, ASM exposes a file system interface for Oracle database files. The content of files that are stored in a disk group are evenly distributed, or striped, to eliminate hot spots and to provide uniform performance across the disks.
Download Software
Download the Oracle software from OTN or MOS depending on your support status.
Installing rpm for ASM LIB
Before ASM installation and configuration we must ensure the ASMLIB rpm are installed or not if not installed then need to install appropriate rpms. Check the operating system kernel version and bit configuration based on the information we can download and install the required rpms. The following commands are used to check the kernel version and bit configurations.
[root@localhostdev]# uname -r
2.6.18-164.el5
[root@localhostdev]# getconf LONG_BIT
32
Required rpms
- Kernel driver – oracleasm is a Linux kernel driver also known as the Oracle ASMLib kernel driver. oracleasm-2.6.18-164.el5-2.0.5-1.el5.i686.rpm
[root@localhost Desktop]# rpm -ivh oracleasm-2.6.18-164.el5-2.0.5-1.el5.i686.rpm
warning: oracleasm-2.6.18-164.el5-2.0.5-1.el5.i686.rpm: Header V3 DSA signature: NOKEY, key ID 1e5e0159
Preparing... ########################################### [100%]
1:oracleasm-2.6.18-164.el########################################### [100%]
- Support tools – oracleasm-support provides the utilities to manage the ASM library driver.
oracleasm-support-2.1.7-1.el5.i386.rpm
[root@localhost Desktop]# rpm -ivh oracleasm-support-2.1.7-1.el5.i386.rpm
warning: oracleasm-support-2.1.7-1.el5.i386.rpm: Header V3 DSA signature: NOKEY, key ID 1e5e0159
Preparing... ########################################### [100%]
1:oracleasm-support ########################################### [100%]
- Application library – oracleasmlib package provides the actual ASM library.
oracl oracleasmlib-2.0.4-1.el5.i386.rpm
[root@localhost Desktop]# rpm -ivh oracleasmlib-2.0.4-1.el5.i386.rpm
warning: oracleasmlib-2.0.4-1.el5.i386.rpm: Header V3 DSA signature: NOKEY, key ID 1e5e0159
Preparing... ########################################### [100%]
1:oracleasmlib ########################################### [100%]
Label the Raw Devices
A disk device can be switched from raw device access to ASMLib access and back with no problems. ASM reads the header off of the disk and recognizes the diskgroup it belongs to. The disk group must be dismounted for this to take place, as the disk cannot be in active use by ASM. ASM won't let you dismount the disk if it is active. There are only two issues to deal with when moving from raw access to ASMLib access or vice versa.
Now label the identified Devices. Usingfdisk command.
[root@localhostdev]# fdisk /dev/sdb
Device contains neither a valid DOS partition table, nor Sun, SGI or OSF disklabel
Building a new DOS disklabel. Changes will remain in memory only,
until you decide to write them. After that, of course, the previous
content won't be recoverable.
The number of cylinders for this disk is set to 2726.
There is nothing wrong with that, but this is larger than 1024,
and could in certain setups cause problems with:
1) software that runs at boot time (e.g., old versions of LILO)
2) booting and partitioning software from other OSs
(e.g., DOS FDISK, OS/2 FDISK)
Warning: invalid flag 0x0000 of partition table 4 will be corrected by w(rite)
Command (m for help): m
Command action
a toggle a bootable flag
b edit bsddisklabel
c toggle the dos compatibility flag
d delete a partition
l list known partition types
m print this menu
n add a new partition
o create a new empty DOS partition table
p print the partition table
q quit without saving changes
s create a new empty Sun disklabel
t change a partition's system id
u change display/entry units
v verify the partition table
w write table to disk and exit
x extra functionality (experts only)
Command (m for help): u
Changing display/entry units to sectors
Command (m for help): n
Command action
e extended
p primary partition (1-4)
p
Partition number (1-4): 1
First sector (63-43805247, default 63): 2048
Last sector or +size or +sizeM or +sizeK (2048-43805247, default 43805247):
Using default value 43805247
Command (m for help): t
Selected partition 1
Hex code (type L to list codes): 83
Command (m for help): p
Disk /dev/sdb: 22.4 GB, 22428286976 bytes
255 heads, 63 sectors/track, 2726 cylinders, total 43805248 sectors
Units = sectors of 1 * 512 = 512 bytes
Device Boot Start End Blocks Id System
/dev/sdb1 2048 43805247 21901600 83 Linux
Command (m for help): w
The partition table has been altered!
Calling ioctl() to re-read partition table.
Syncing disks.
[root@localhostdev]#
So need to follow the same steps for rest of the raw devices.
Set up the Oracle ASMLIB
[root@localhost Desktop]# /etc/init.d/oracleasm configure
Configuring the Oracle ASM library driver.
This will configure the on-boot properties of the Oracle ASM library
driver. The following questions will determine whether the driver is
loaded on boot and what permissions it will have. The current values
will be shown in brackets ('[]'). Hitting <ENTER> without typing an
answer will keep that current value. Ctrl-C will abort.
Default user to own the driver interface []: root
Default group to own the driver interface []: root
Start Oracle ASM library driver on boot (y/n) [n]: y
Scan for Oracle ASM disks on boot (y/n) [y]:
Writing Oracle ASM library driver configuration: done
Initializing the Oracle ASMLib driver: [ OK ]
Scanning the system for Oracle ASMLib disks: [ OK ]
Marking Disk s as ASM Disks
There are a lot of things that ASM writes to a disk, but here we are only concerned with the two parts of a disk header that ASMLib cares about. The first is the disk marker or "tag". All ASM disks have the tag “ORCLDISK" stamped on them. If the tag exists, the disk is either in use by ASM or a candidate for use by ASM. This tag is added by ASMLib when a disk is configured for ASMLib use via the command/etc/init.d/oracleasmcreatedisk. If a disk is first used via a raw device, the tag is added by ASM itself. Once this tag is added, ASMLib and its associated tools will consider the disk "created". This will be important below.
The second part of the disk header that ASMLib cares about is the label. This is a string of 20 characters or less allotted for ASMLib (any ASMLib, not just the Linux specific one) to use to identify a disk. When a system administrator allocates a disk to ASM using the /etc/init.d/oracleasmcreatedisk command, the associated label is written to the device. Consider a disk allocated thusly.
Using /etc/init.d/oracleasmCreatedisk command we can Mark the devices as a ASM disk
[root@localhostdev]# /etc/init.d/oracleasmcreatedisk DATA /dev/sdb1
Marking disk "DATA" as an ASM disk: [ OK ]
[root@localhostdev]# /etc/init.d/oracleasmcreatedisk DATA1 /dev/sdc1
Marking disk "DATA" as an ASM disk: [ OK ]
[root@localhostdev]# /etc/init.d/oracleasmcreatedisk DATA2 /dev/sdd1
Marking disk "DATA" as an ASM disk: [ OK ]
[root@localhostdev]# /etc/init.d/oracleasmcreatediskFRA1 /dev/sde1
Marking disk "DATA" as an ASM disk: [ OK ]
[root@localhostdev]# /etc/init.d/oracleasmcreatediskFRA2 /dev/sdf1
Marking disk "DATA" as an ASM disk: [ OK ]
[root@localhostdev]# /etc/init.d/oracleasmcreatediskFRA3 /dev/sdg1
Marking disk "DATA" as an ASM disk: [ OK ]
Scanning the created Disks
When a disk is added to aASM setup, the other nodes need to be notified about it. Run the 'createdisk' command on one node, and then run 'scandisks' on every other node:
After marking the devices as an ASM disks we need to scan the disks for Oracle ASMLib Disks
[root@localhostdev]# /etc/init.d/oracleasm scandisks
Scanning the system for Oracle ASMLib disks: [ OK ]
Validating the Disks
Any operating system disk can be queried to see if it is used by ASM.
We have to validate the marking disks are valid disks or not it will valid by the following command.
[root@localhost ~]# /etc/init.d/oracleasmquerydisk FRA1
Disk "FRA1" is a valid ASM disk
[root@localhost ~]# /etc/init.d/oracleasmquerydisk FRA2
Disk "FRA2" is a valid ASM disk
[root@localhost ~]# /etc/init.d/oracleasmquerydisk FRA3
Disk "FRA3" is a valid ASM disk
[root@localhost ~]# /etc/init.d/oracleasmquerydisk DATA
Disk "DATA" is a valid ASM disk
[root@localhost ~]# /etc/init.d/oracleasmquerydisk DATA1
Disk "DATA1" is a valid ASM disk
[root@localhost ~]# /etc/init.d/oracleasmquerydisk DATA2
Disk "DATA2" is a valid ASM disk
[root@localhost ~]#
Listing out the Disks
Existing disks can be queried and listed:
Using the following command we can list out the oracleasm disks.
[root@localhost ~]# /etc/init.d/oracleasmlistdisks
DATA
DATA1
DATA2
FRA1
FRA2
FRA3
The disks are now ready to be used by ASM.
Creation of user and groups
We must create the Oracle Operating system user, two Groups oinstall&dba and Base directories for installing Grid software.
[root@localhost ~]# groupadd -g 1000 oinstall
[root@localhost ~]# groupadd -g 1200 dba
[root@localhost ~]# useradd -u 1100 -g oinstall -G dba oracle
[root@localhost ~]# mkdir -p /u01/app/11.2.0/grid
[root@localhost ~]# mkdir -p /u01/app/oracle
[root@localhost ~]# chown -R oracle:oinstall /u01
[root@localhost ~]# chmod -R 775 /u01/
[root@localhost ~]# id oracle
uid=1100(oracle) gid=1000(oinstall) groups=1000(oinstall),1200(dba)
[root@localhost ~]# ls -ld /u01/app/11.2.0/grid
drwxrwxr-x 2 oracle oinstall 4096 May 23 15:49 /u01/app/11.2.0/grid
[root@localhost ~]# ls -ld /u01/app/oracle
drwxrwxr-x 2 oracle oinstall 4096 May 23 15:50 /u01/app/oracle
[root@localhost ~]# ls -l /dev/sd*
brw-r----- 1 root disk 8, 0 May 23 13:57 /dev/sda
brw-r----- 1 root disk 8, 1 May 23 13:58 /dev/sda1
brw-r----- 1 root disk 8, 2 May 23 13:58 /dev/sda2
brw-r----- 1 root disk 8, 3 May 23 13:57 /dev/sda3
brw-r----- 1 root disk 8, 4 May 23 13:57 /dev/sda4
brw-r----- 1 root disk 8, 5 May 23 13:58 /dev/sda5
brw-r----- 1 root disk 8, 6 May 23 13:58 /dev/sda6
brw-r----- 1 root disk 8, 7 May 23 13:58 /dev/sda7
brw-r----- 1 root disk 8, 16 May 23 13:57 /dev/sdb
brw-r----- 1 root disk 8, 17 May 23 14:23 /dev/sdb1
brw-r----- 1 root disk 8, 32 May 23 14:17 /dev/sdc
brw-r----- 1 root disk 8, 33 May 23 14:25 /dev/sdc1
brw-r----- 1 root disk 8, 48 May 23 14:50 /dev/sdd
brw-r----- 1 root disk 8, 49 May 23 14:52 /dev/sdd1
brw-r----- 1 root disk 8, 64 May 23 14:59 /dev/sde
brw-r----- 1 root disk 8, 65 May 23 15:00 /dev/sde1
brw-r----- 1 root disk 8, 80 May 23 15:04 /dev/sdf
brw-r----- 1 root disk 8, 81 May 23 15:08 /dev/sdf1
brw-r----- 1 root disk 8, 96 May 23 15:11 /dev/sdg
brw-r----- 1 root disk 8, 97 May 23 15:12 /dev/sdg1
[root@localhost ~]# /etc/init.d/oracleasm configure
Configuring the Oracle ASM library driver.
This will configure the on-boot properties of the Oracle ASM library
driver. The following questions will determine whether the driver is
loaded on boot and what permissions it will have. The current values
will be shown in brackets ('[]'). Hitting <ENTER> without typing an
answer will keep that current value. Ctrl-C will abort.
Default user to own the driver interface [root]: oracle
Default group to own the driver interface [root]: dba
Start Oracle ASM library driver on boot (y/n) [y]: y
Scan for Oracle ASM disks on boot (y/n) [y]: y
Writing Oracle ASM library driver configuration: done
Initializing the Oracle ASMLib driver: [ OK ]
Scanning the system for Oracle ASMLib disks: [ OK ]
Setting the Environmental Variable
In the terminal switch to the oracle user and set the environmental variable in the initialization file .bash_profile.
[oracle@localhost ~]$ vi .bash_profile
Add the following environmental variables on the .bash_profile
ORACL_HOME=/u01/app/11.2.0/grid
ORACLE_SID=+ASM
PATH=$ORACLE_HOME/bin:$PATH
Export ORACLE_HOME
Export ORACLE_SID
Export PATH
[oracle@localhost ~]$ echo $ORACLE_HOME
/u01/app/11.2.0/grid
[oracle@localhost ~]$ echo $ORACLE_SID
+ASM
[oracle@localhost ~]$ echo $PATH
/u01/app/11.2.0/grid/bin:/usr/kerberos/bin:/usr/local/bin:/bin:/usr/bin:/home/oracle/bin
Installing Grid Infrastructure for ASM
Now the actual process starts here:
Install the Oracle Grid Infrastucture11gR2 from Graphical session as oracle user. Run the run installer and it will start the grid installation.
[root@localhost Desktop]# su oracle
[oracle@localhost Desktop]$ ./runInstaller
Starting Oracle Universal Installer...
Checking Temp space: must be greater than 80 MB. Actual 6100 MB Passed
Checking swap space: must be greater than 150 MB. Actual 4000 MB Passed
Checking monitor: must be configured to display at least 256 colors. Actual 16777216 Passed
Preparing to launch Oracle Universal Installer from /tmp/OraInstall2012-05-23_08-23-22PM. Please wait ...[oracle@localhost Desktop]$ You can find the log of this install session at:
/u01/app/oraInventory/logs/installActions2012-05-23_08-23-22PM.log
After Graphical sessionlaunched in the select installation option window choose the second option that is install and Configure Grid Infrastucture for a Standalone Server and click next.

Select English and click next

In Create ASM Disk Group window Disk Group Name textbox we need mention the Disk Group Name Like DATA and choose the Redundancy as Normal and in Add disks panel select candidate Disks and then check the needed disks and click next.

Enter the desired password for ASM & ASMSNMP users through the specify password window & click next

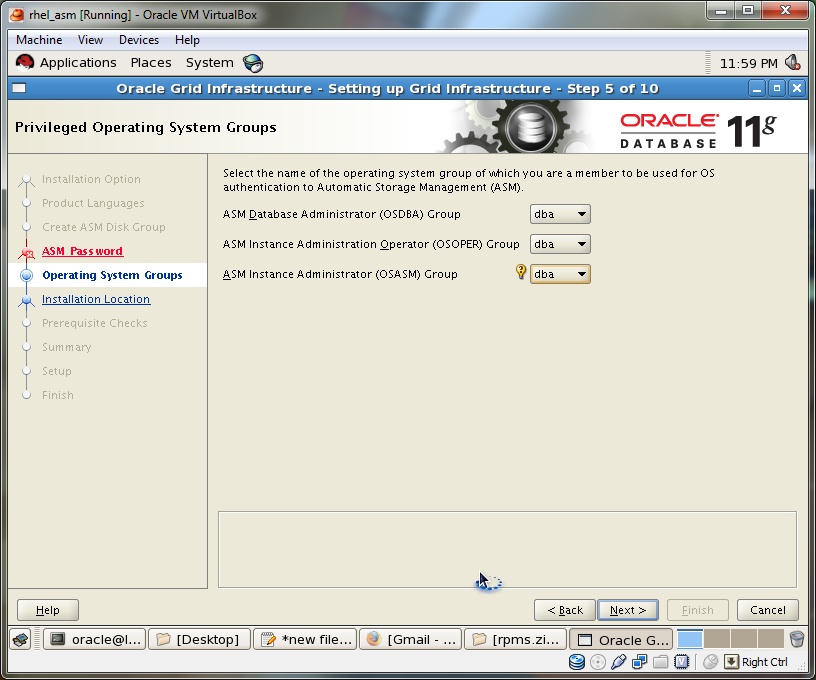
Then select dba for All Groups and then click next.
Now we have to specify the Oracle Base and Oracle Home directories to install ASM software location Here Oracle Base directory as /u01/app/oracle and the software Location as /u01/app/11.2.0/grid.Click next.

Enter the oracle Inventory Directory as /u01/app/oraInventory on the create inventory window and click next.

Install the following packages if they are not already present.
Now we have to install the below rpms and provided with links also
- gcc-4.1.2
[root@localhostrpms.zip_FILES]# rpm -ivh gcc-4.1.2-52.el5.i386.rpm --nodeps
warning: gcc-4.1.2-52.el5.i386.rpm: Header V3 DSA signature: NOKEY, key ID e8562897
Preparing... ########################################### [100%]
1:gcc ########################################### [100%]
- gcc-c++-4.1.2
root@localhostrpms.zip_FILES]# rpm -ivhgcc-c++-4.1.2-52.el5.i386.rpm --nodeps
warning: gcc-c++-4.1.2-52.el5.i386.rpm: Header V3 DSA signature: NOKEY, key ID e8562897
Preparing... ########################################### [100%]
1:gcc-c++ ########################################### [100%]
- libgomp-4.1.2
[root@localhostrpms.zip_FILES]# rpm -ivh libgomp-4.4.6-3.el5.1.i386.rpm --nodeps
warning: libgomp-4.4.6-3.el5.1.i386.rpm: Header V3 DSA signature: NOKEY, key ID e8562897
Preparing... ########################################### [100%]
1:libgomp ########################################### [100%]
- elfutils-libelf-devel-0.125
[root@localhostrpms.zip_FILES]# rpm -ivh elfutils-libelf-devel-0.137-3.el5.i386.rpm --nodeps
warning: elfutils-libelf-devel-0.137-3.el5.i386.rpm: Header V3 DSA signature: NOKEY, key ID e8562897
Preparing... ########################################### [100%]
1:elfutils-libelf-devel ########################################### [100%]
- glibc-devel-2.5
[root@localhostrpms.zip_FILES]# rpm -ivh glibc-devel-2.5-81.i386.rpm --nodeps
warning: glibc-devel-2.5-81.i386.rpm: Header V3 DSA signature: NOKEY, key ID e8562897
Preparing... ########################################### [100%]
1:glibc-devel ########################################### [100%]
- glibc-headers-2.5
[root@localhostrpms.zip_FILES]# rpm -ivh glibc-headers-2.5-81.i386.rpm --nodeps
warning: glibc-headers-2.5-81.i386.rpm: Header V3 DSA signature: NOKEY, key ID e8562897
Preparing... ########################################### [100%]
1:glibc-headers ########################################### [100%]
- libaio-devel-0.3.106
[root@localhostrpms.zip_FILES]# rpm -ivh libaio-devel-0.3.106-5.i386.rpm --nodeps
warning: libaio-devel-0.3.106-5.i386.rpm: Header V3 DSA signature: NOKEY, key ID e8562897
Preparing... ########################################### [100%]
1:libaio-devel ########################################### [100%]
- libstdc++-devel-4.1.2
ftp://ftp.pbone.net/mirror/ftp.centos.org/5.8/os/x86_64/CentOS/libstdc++-devel-4.1.2-52.el5.i386.rpm
[root@localhostrpms.zip_FILES]# rpm -ivhlibstdc++-devel-4.1.2-52.el5.i386.rpm --nodeps
warning: libstdc++-devel-4.1.2-52.el5.i386.rpm: Header V3 DSA signature: NOKEY, key ID e8562897
Preparing... ########################################### [100%]
1:libstdc++-devel ########################################### [100%]
- sysstat-7.0.2
[root@localhostrpmsasmlib.zip_FILES]# rpm -ivh sysstat-7.0.2-11.el5.i386.rpm --nodeps
warning: sysstat-7.0.2-11.el5.i386.rpm: Header V3 DSA signature: NOKEY, key ID e8562897
Preparing... ########################################### [100%]
1:sysstat ########################################### [100%]
- unixODBC-2.2.11
[root@localhost Desktop]# rpm -ivh unixODBC-2.2.11-6.2.1.i386.rpm --nodeps
warning: unixODBC-2.2.11-6.2.1.i386.rpm: Header V3 DSA signature:
NOKEY, key ID 4f2a6fd2
Preparing... ########################################### [100%]
1:unixODBC ########################################### [100%]
warning: unixODBC-2.2.11-6.2.1.i386.rpm: Header V3 DSA signature:
NOKEY, key ID 4f2a6fd2
Preparing... ########################################### [100%]
1:unixODBC ########################################### [100%]
- unixODBC-devel-2.2.11
[root@localhost Desktop]# rpm–ivhunixODBC-devel-2.2.11-10.el5.i386.rpm --nodeps
warning: unixODBC-devel-2.2.11-10.el5.i386.rpm: Header V3 DSA
signature: NOKEY, key ID 192a7d7d
Preparing... ########################################### [100%]
1:unixODBC-devel ########################################### [100%]
warning: unixODBC-devel-2.2.11-10.el5.i386.rpm: Header V3 DSA
signature: NOKEY, key ID 192a7d7d
Preparing... ########################################### [100%]
1:unixODBC-devel ########################################### [100%]
Some Operating System requirements such as kernel &swap parameters need to review ,
So click the fix & check again button.

Now open new terminal and switch the user from Oracle user to Root user and execute the Fixup Script in termianal.
[oracle@localhost ~]$ su root
Password:
[root@localhost oracle]# /tmp/CVU_11.2.0.1.0_oracle/runfixup.sh
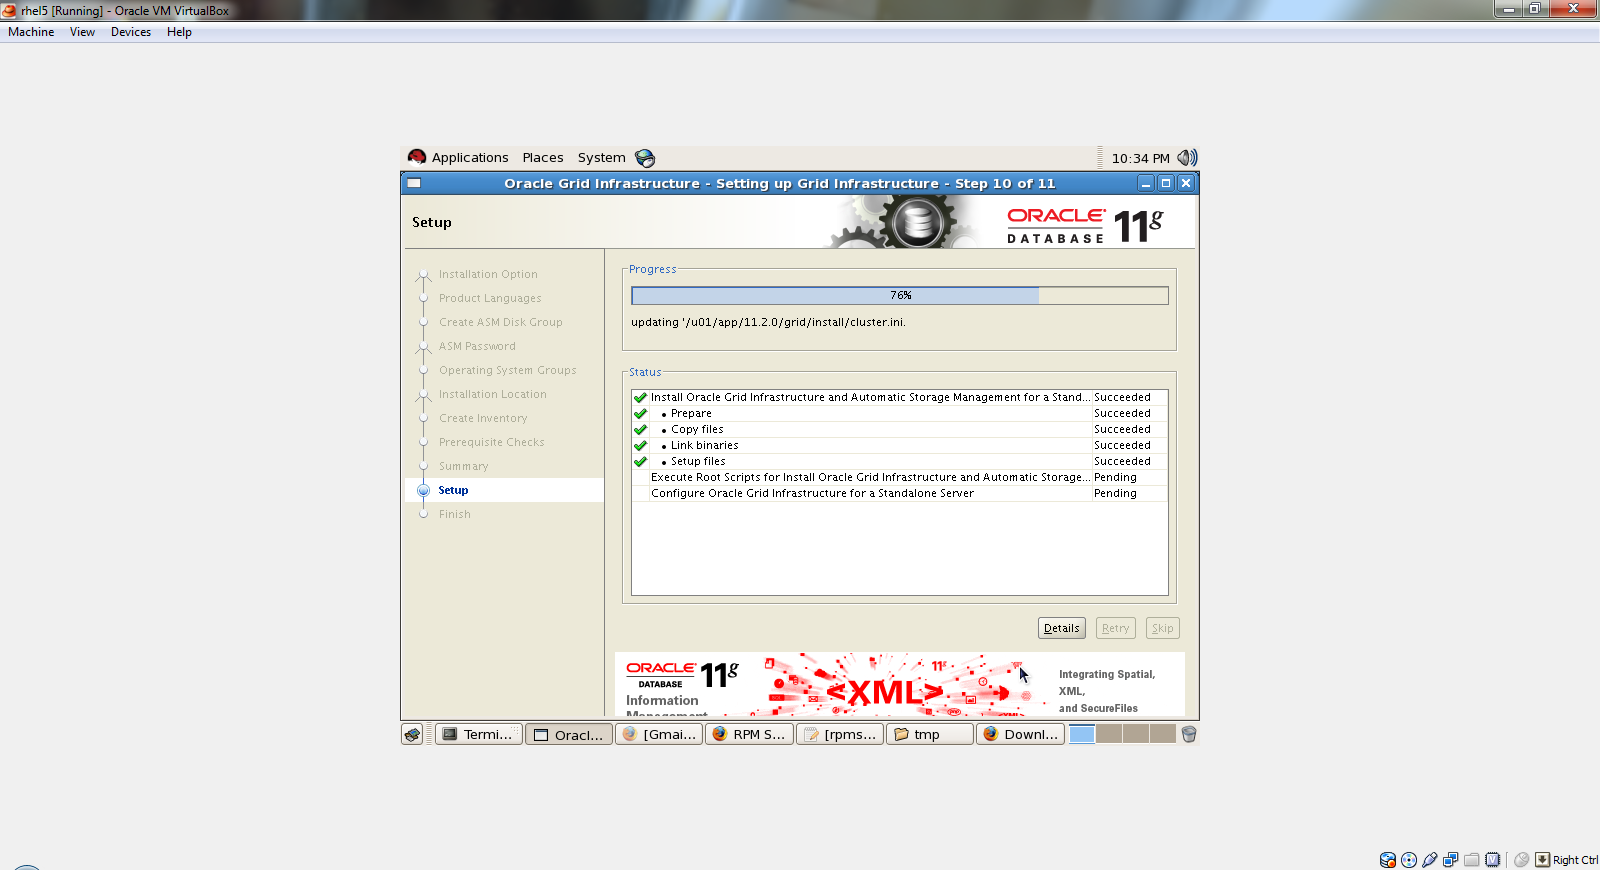
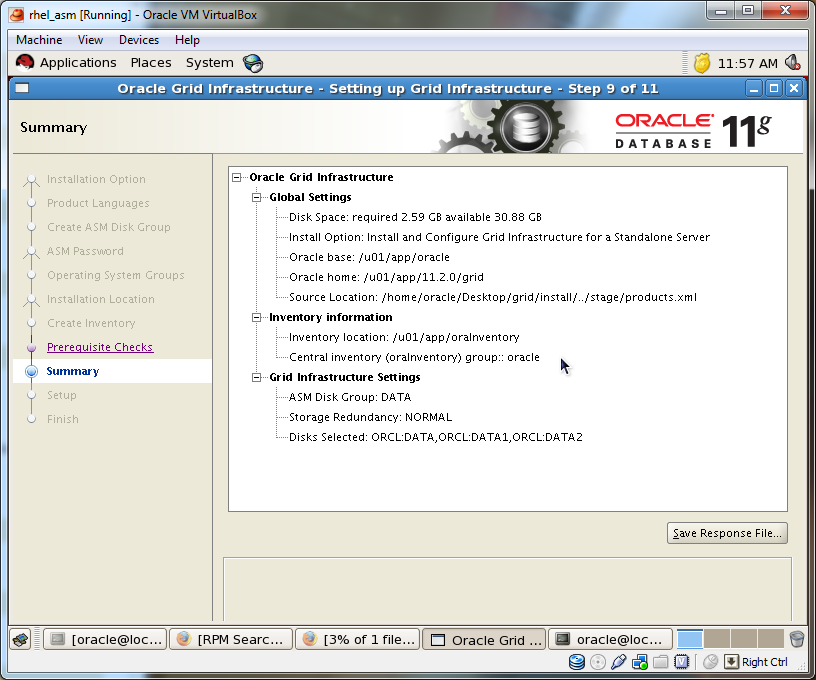
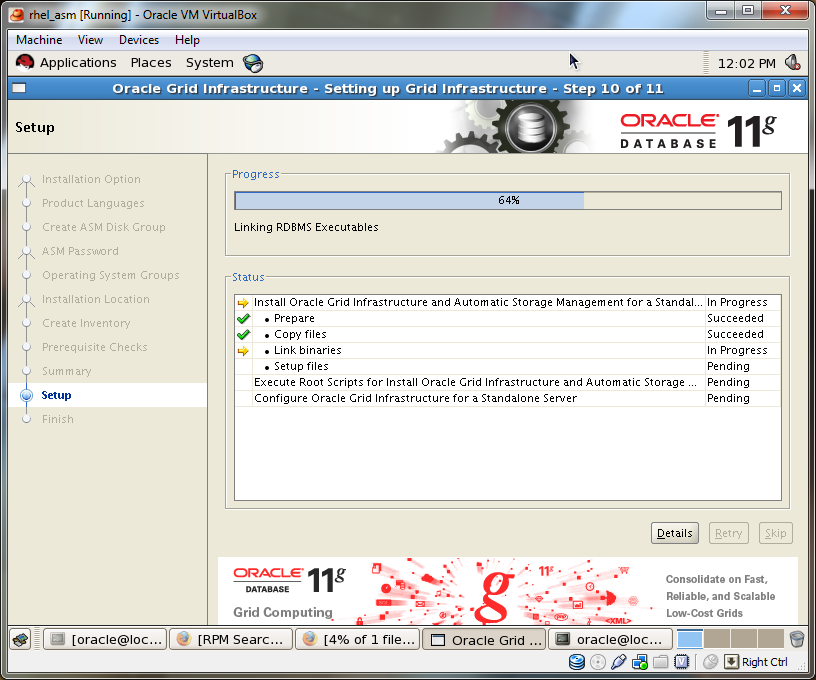
After executing the script click the ok button and once again check the parameters by checkagain button if it is ok then next summary window will appear so please review the details on the summary screen and click finish button and monitor the installation.

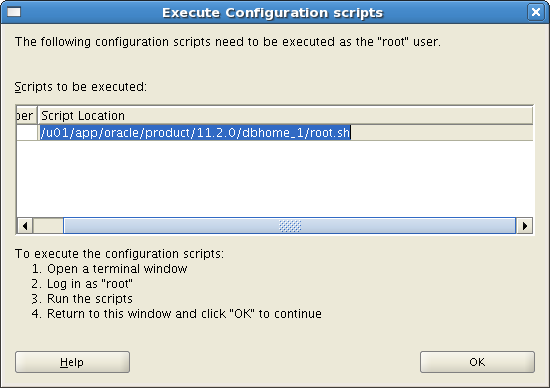
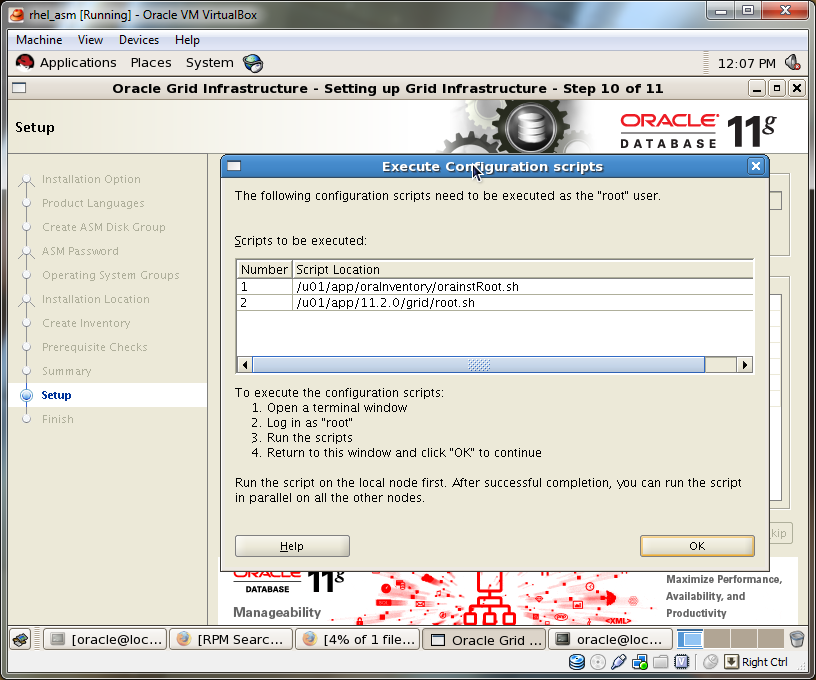
Execute the scripts orainstRoot.sh and root.sh as a root user then click ok button.
[oracle@localhost ~]$ su root
Password:
[root@localhost oracle]# /u01/app/orainventory/orainstRoot.sh
[root@localhost oracle]# /u01/app/11.2.0/grid/root.sh
It will check the prerequisite for installing ASM software and ASM services.
Installation finished successfully after execute the following scripts in root user.
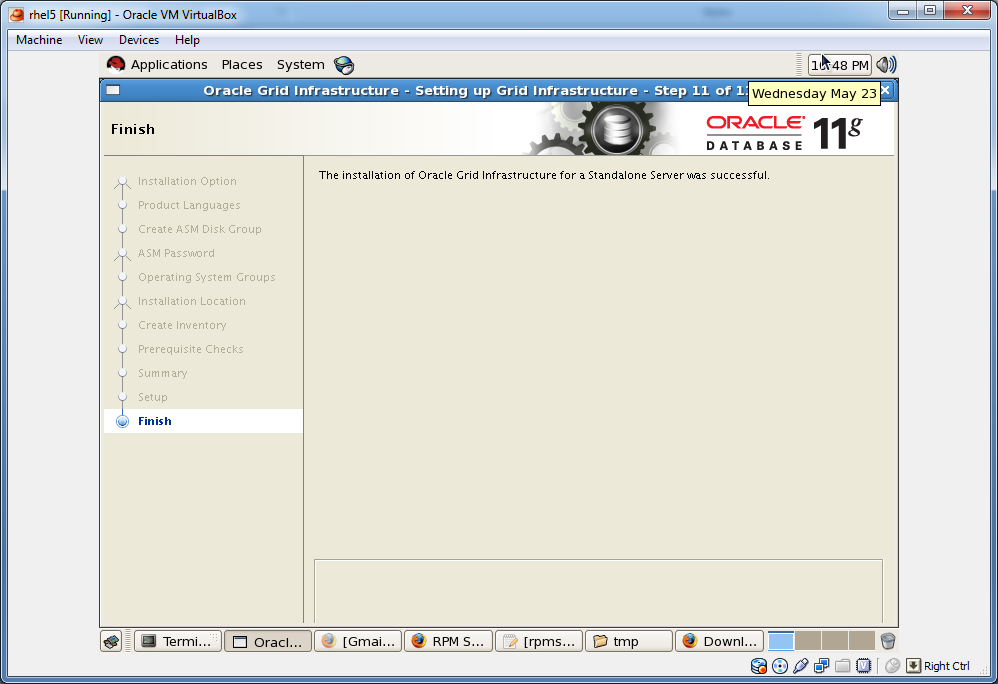
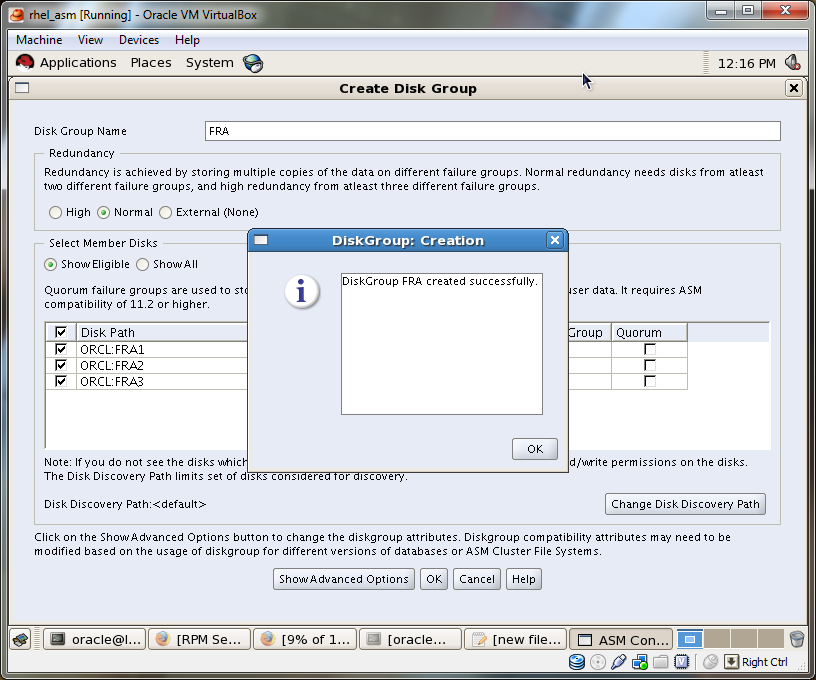
After confirm the Oracle11gR2 Grid Infrastructure installation completed successfully the click the close button then run the ASMCA for configure the ASM disk groups.
[oracle@localhost ~]$ asmca
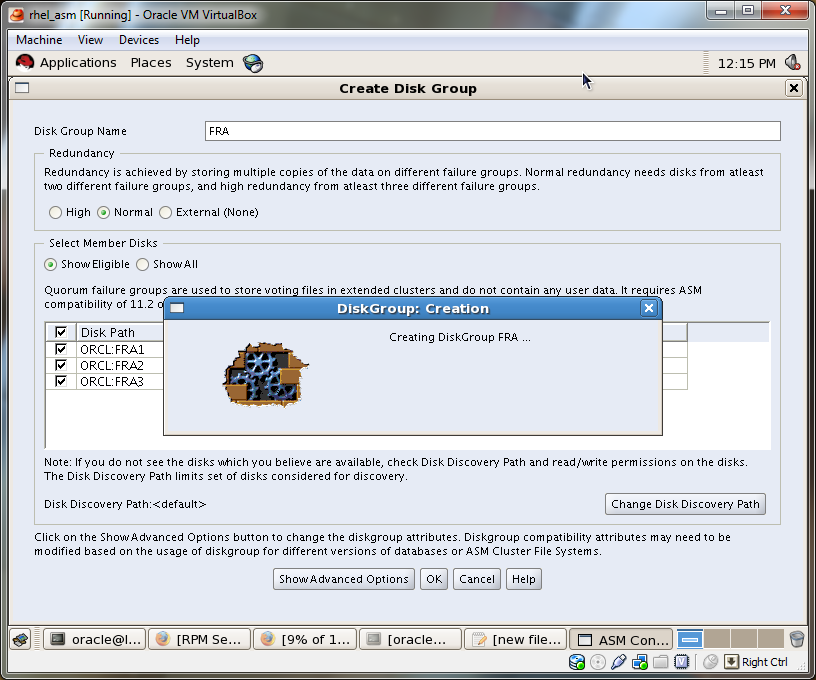
Here we need select the disks for FRADiskgroup and enter the name FRA for Disk Group Name and select the normal as redundancy and choose disks on Select Member Disks Panel and click ok.

After reviewed the Disk Groups press exit button.

Once the raw disks selected it will mount the disks as single Disk Group.
The mounted Disk Group will be adding in Disk Groups.

[oracle@localhost ~]$ . oraenv
ORACLE_SID = [+ASM] ?
The Oracle base for ORACLE_HOME=/u01/app/11.2.0/grid is /u01/app/oracle
[oracle@localhost ~]$ sqlplus "/as sysasm"
SQL*Plus: Release 11.2.0.1.0 Production on Wed May 23 22:57:51 2012
Copyright (c) 1982, 2009, Oracle. All rights reserved.
Connected to:
Oracle Database 11g Enterprise Edition Release 11.2.0.1.0 - Production
With the Automatic Storage Management option
SQL> select name,state from v$asm_diskgroup;
NAME STATE
------------------------------ -----------
DATA MOUNTED
FRA MOUNTED
SQL> col path for a20
SQL> select name,path from v$asm_disk;
NAME PATH
---------- --------------------
FRA1 ORCL:FRA1
FRA2 ORCL:FRA2
FRA3 ORCL:FRA3
DATA ORCL:DATA
DATA1 ORCL:DATA1
DATA2 ORCL:DATA2
6 rows selected.
SQL> exit
Disconnected from Oracle Database 11g Enterprise Edition Release 11.2.0.1.0 - Production
With the Automatic Storage Management option
Database software installation
Extract the downloaded the software to one file and ./runinstaller from oracle user
Skip the email id if we are registered with oracle support the issues the registered email id then clicks next.
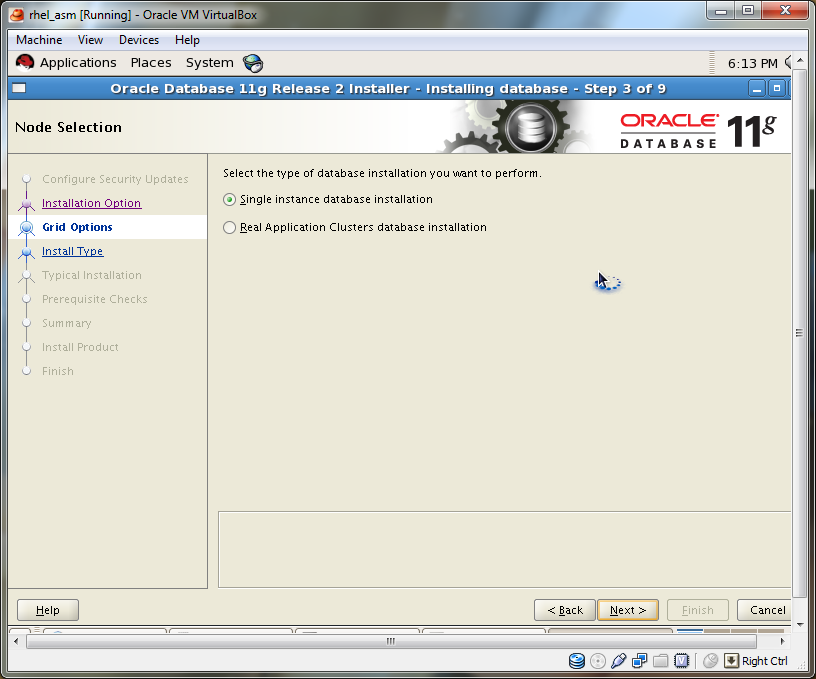
Select the installation type as single instance or RAC and then click next
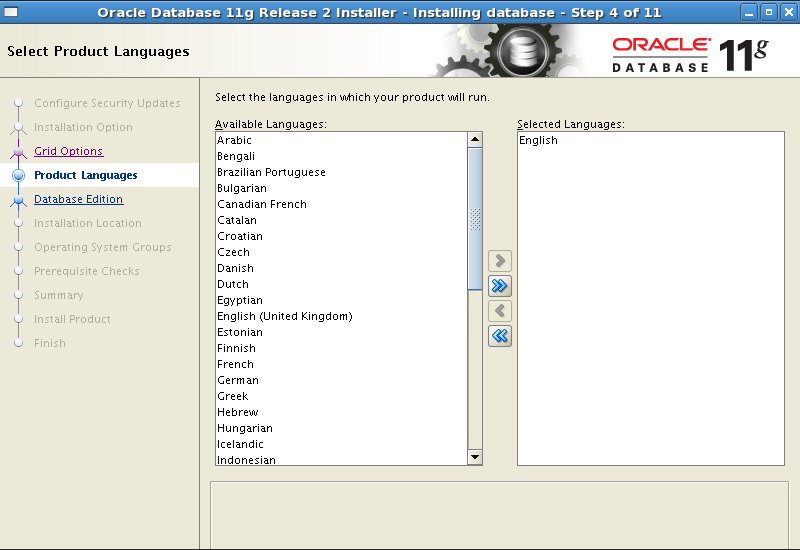
Select English language and then click next
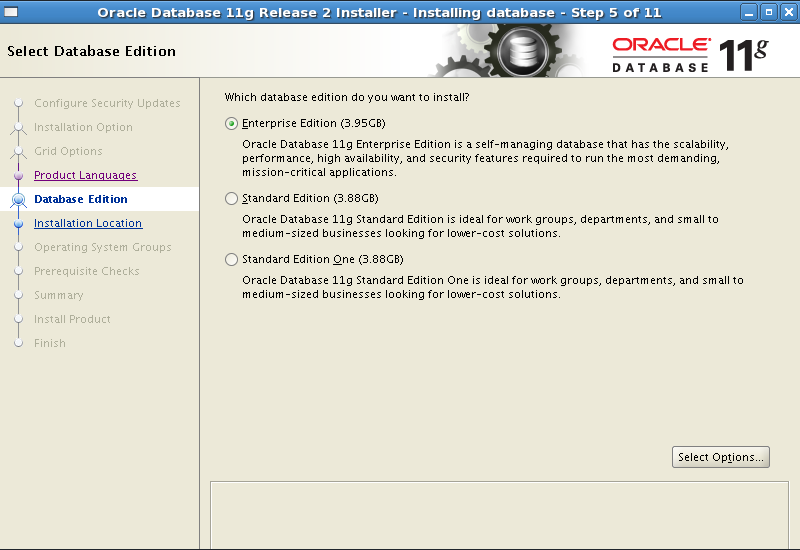
Select the Which Database edition do u want to install ex: Enterprise Edition. Then click next.
Specify the locations of Oracle Base and Software Location then click next.

Select the Operating System Groups as dba. And then click next.

It will perform the prerequisite the checks like kernel parameters, memory, storage, size of the database.


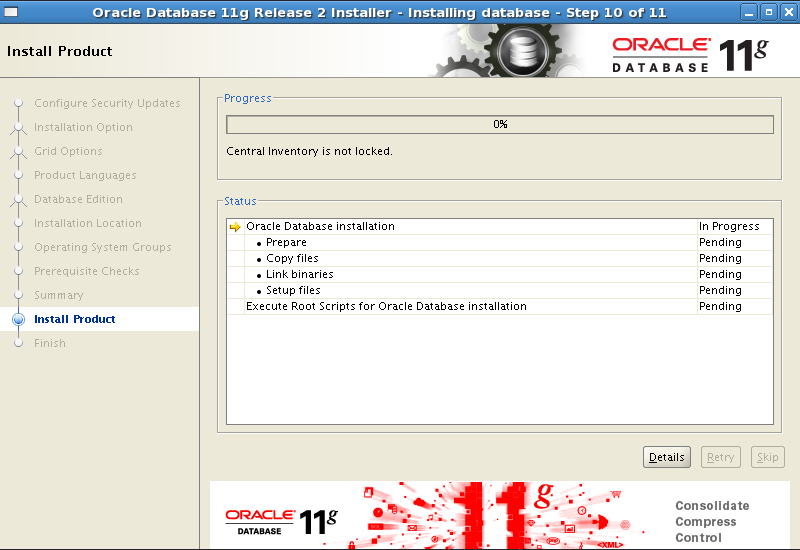
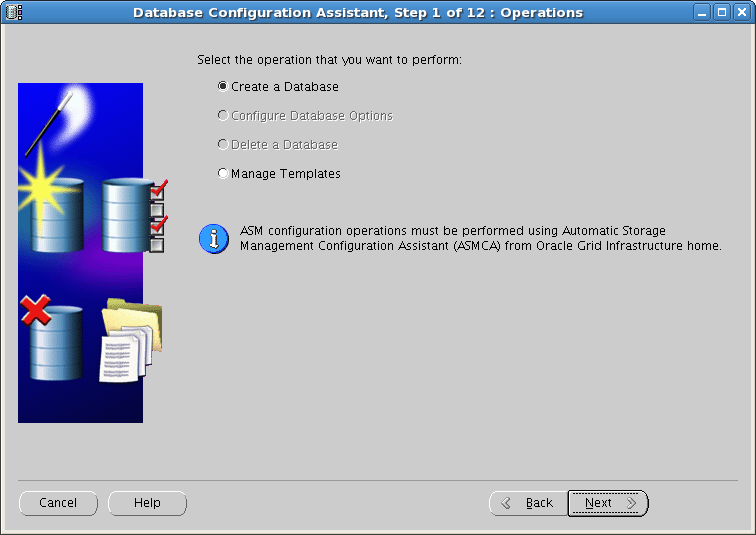
After installing the Oracle Database 11gr2 software. We can create database by using terminal just type dbca and proceed with below steps.
Create a Database and Click next
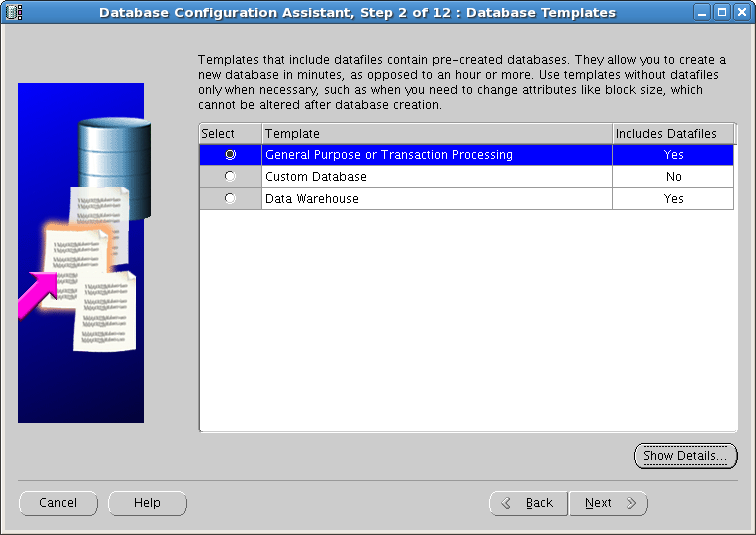
Select General Purpose or Transaction processing click next.
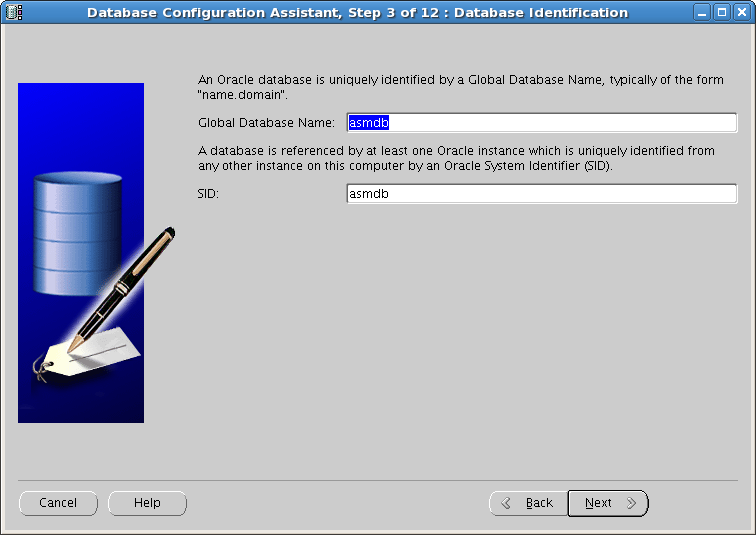
asmdb or any other database name you want. Then click next
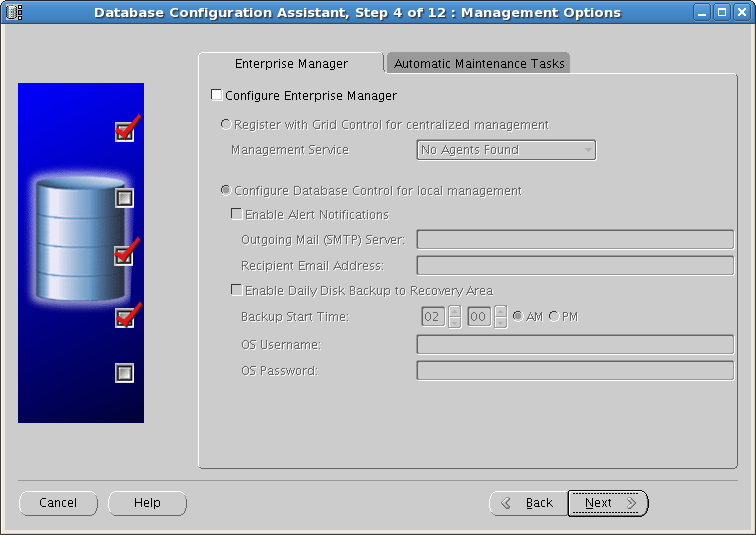
Uncheck Configure Enterprise Manager Click Next
Use the same Administrative Password for All Accounts. Then enter the password you want to sys
and system user. Click Next
and system user. Click Next

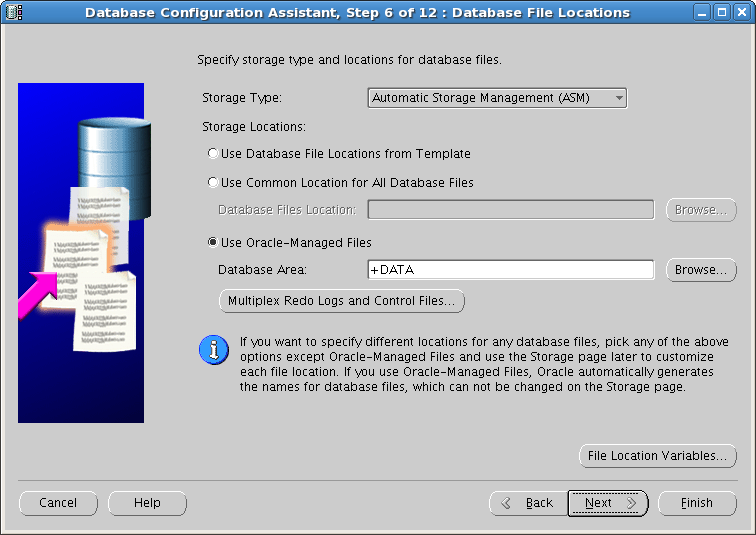
Select storage type as ASM and give the Disk Group names ex: +DATA
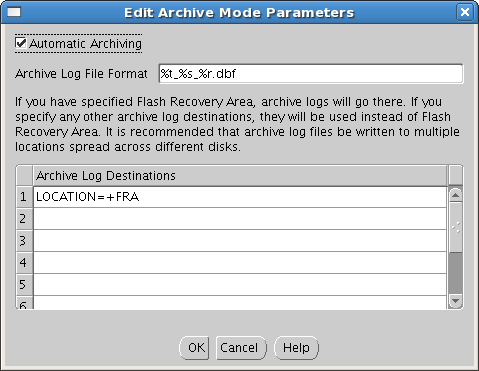
Specify the Flash Recovery Area as FRA and edit the Archive Mode Parameters and give the location for Archive logs as +FRA.

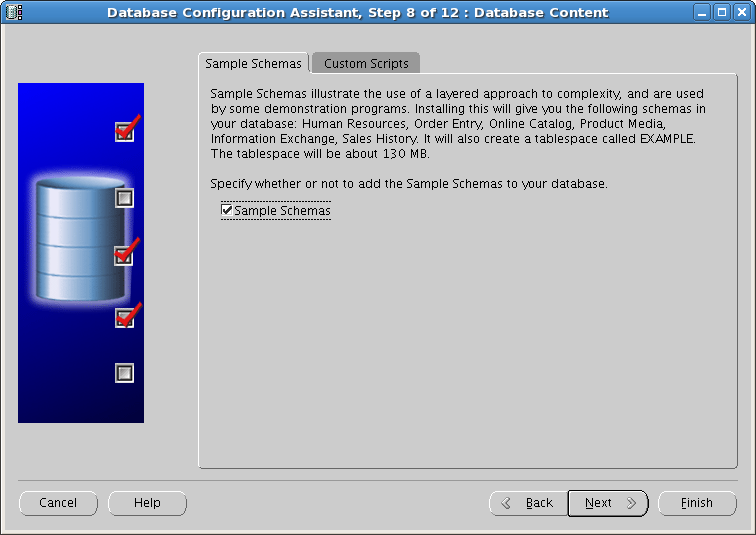
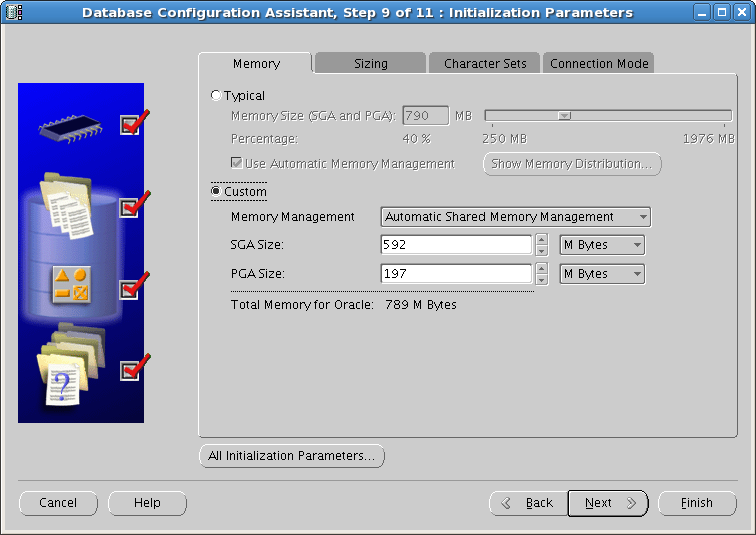
Select the Sample Schemas and enter the SGA & PGA values as per your requirement.
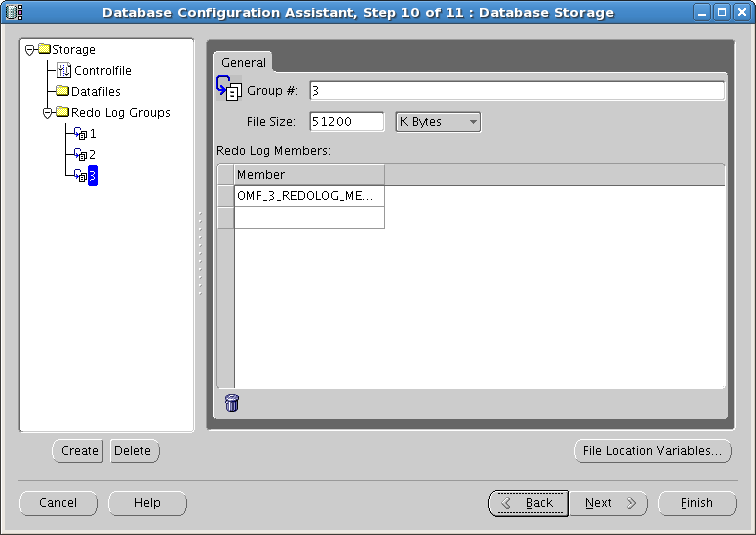
Specify the location of Data files, Control files, Redo log Groups
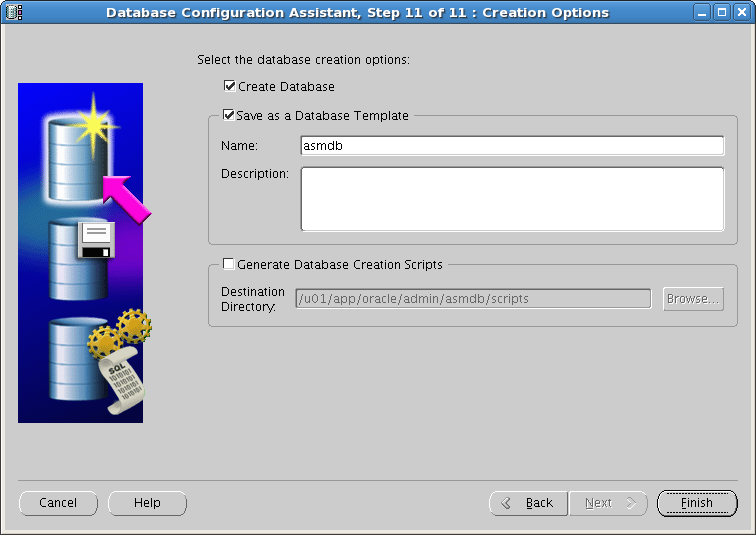
The Database creation will now start. Once database is created Click Finish


After finishing the Database installation execute the following script in root user.